Pool Tile Replacement: Your Step-by-Step Guide
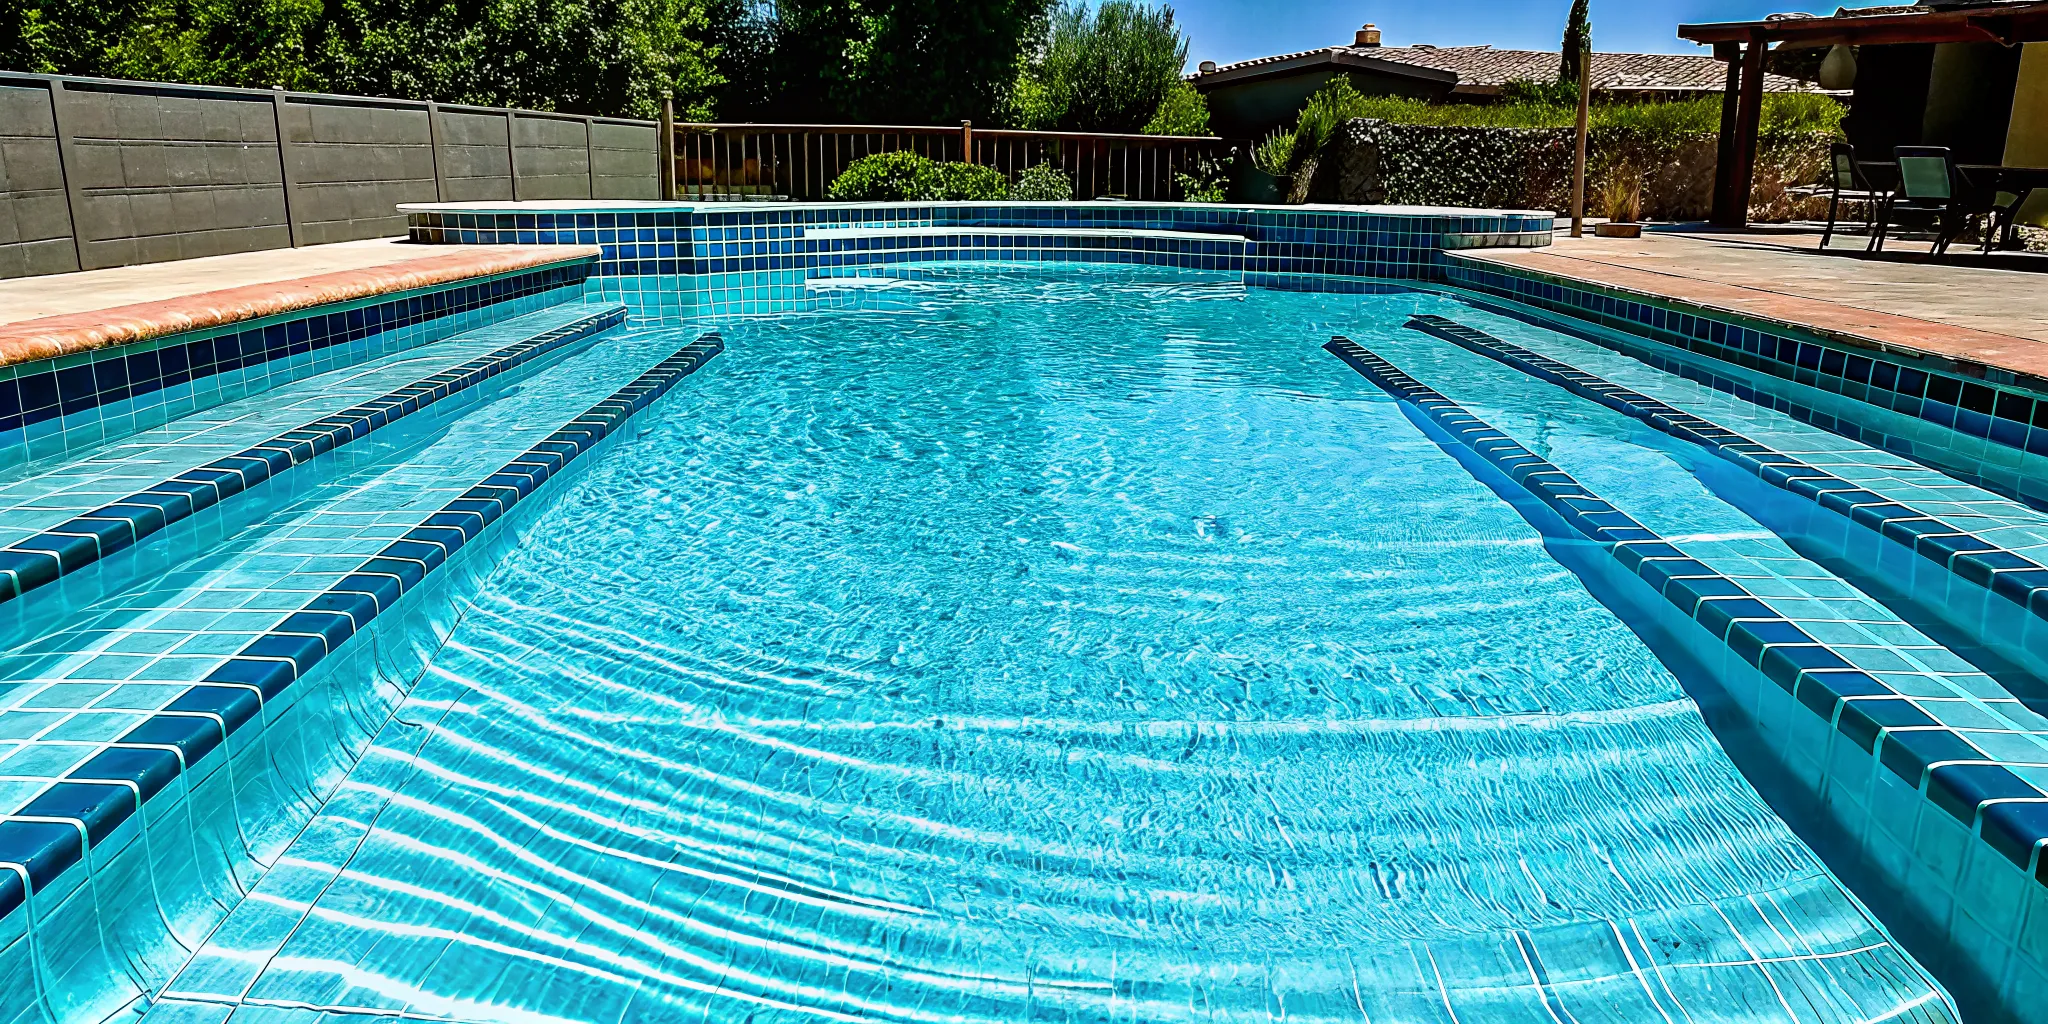
Owning a pool in the Denver area comes with its own unique set of challenges, chief among them our dramatic temperature swings. The freeze-thaw cycle is the number one enemy of pool tiles. Water inevitably finds its way into microscopic cracks in the grout, and when it freezes, it expands with incredible force, popping tiles off and turning small issues into major damage over a single winter. This makes proactive maintenance and timely repairs absolutely essential. This guide is written with Colorado pool owners in mind, helping you understand why a professional pool tile replacement is often the smartest choice to ensure your pool can withstand our demanding climate for years to come.
Ready for a cleaner pool?
Denver's trusted pool care professionals since 1982. Get started today.
Schedule ServiceKey Takeaways
- Look beyond a single cracked tile: Widespread cracking, loose tiles, or a chalky residue often point to deeper issues. Before you patch, investigate the surface underneath to ensure a simple fix is all you really need.
- Prep the surface and use the right materials: A lasting repair starts with a perfectly clean surface and products made for underwater use. Always scrape away old adhesive completely and choose waterproof mortar and grout to prevent your new tiles from failing.
- Give it time to cure, then maintain it: Rushing to refill the pool can ruin your hard work, so let the new grout fully harden. Once it's cured, protect your investment with regular cleaning and balanced water chemistry to keep your tiles looking new.
Is It Time to Replace Your Pool Tiles?
Your pool tiles do more than just make your pool look pretty; they form a protective barrier for the pool shell along the waterline. Over time, they take a beating from the sun, water, and especially here in Denver, Colorado’s changing seasons. While a single chipped tile might not seem like a big deal, it can be a sign of bigger problems brewing beneath the surface. Knowing what to look for can help you decide if you’re facing a simple repair or a full-blown replacement project. Ignoring these signs can lead to water loss, structural damage, and a much bigger headache later on.
Catching problems early is the key to saving yourself from more expensive and complicated repairs. A full pool remodel and rehabilitation can completely transform your backyard oasis, but you might not need to go that far if you act quickly. Sometimes, all it takes is paying attention to the little warning signs your tiles are giving you. Think of it as a health checkup for your pool. Below, we’ll walk through the key indicators that your pool tiles are nearing the end of their life, so you can make an informed decision and keep your pool in top shape for years to come.
Spotting Cracks, Chips, and Breaks
A few hairline cracks might not seem urgent, but they are often the first sign of trouble. According to tile experts, "[c]racked tiles are a frequent problem, often caused by temperature changes, heavy impacts, or general wear over time." Here in Denver, the freeze-thaw cycle puts extra stress on pool materials. Water can seep into tiny cracks, freeze, expand, and turn a small issue into a major one. If you notice multiple cracked or chipped tiles, it’s a clear signal that the tile is becoming brittle and failing. A single broken tile can be replaced, but widespread cracking suggests it’s time for a complete overhaul.
Identifying Fading, Stains, and Discoloration
Is your once-vibrant waterline looking dull and tired? Even with perfect water chemistry and regular cleaning and maintenance, tiles will eventually show their age. As one guide on tile replacement notes, "[o]ver time, tiles fade and wear out, even with good care." Constant exposure to UV rays and pool chemicals can cause colors to fade, while mineral deposits can leave stubborn stains that no amount of scrubbing will remove. While this is primarily a cosmetic issue, it can significantly detract from your pool’s overall appearance. If your tiles look permanently dingy, replacing them can breathe new life into your entire pool area.
Finding Loose Tiles, Missing Grout, and Efflorescence
If you can wiggle a tile, you have a problem. Loose tiles are often a result of deteriorating grout. Grout is the mortar that fills the gaps and helps hold everything in place. When it "breaks down, dirt gets in, and tiles can loosen and fall out." You might also spot a white, chalky residue on your grout or tile, which is a phenomenon called efflorescence. This is a tell-tale sign that water is seeping through from behind the tile and leaving mineral deposits as it evaporates. Missing grout and loose tiles are not just ugly; they compromise the integrity of your pool’s surface and can lead to leaks.
Checking for Underlying Issues Before You Begin
Before you try to stick a fallen tile back on, take a moment to play detective. A loose tile can be a symptom of a much deeper problem with your pool’s structure. As one pool owner on Reddit wisely suggested, it's important to check for "'growth inside' or other issues that might be causing tiles to fall off." Look closely at the surface behind the tile. Is the concrete crumbling or cracked? Does it feel damp or spongy? These are red flags for structural damage that must be addressed before any new tile is set. Simply gluing a new tile over a compromised surface is a temporary fix at best; the new tile will eventually fail, too.
What Tools and Materials Do You Need?
Before you start chipping away at old tiles, it’s important to gather the right supplies. Having everything on hand makes the job go smoother and ensures your repair will last. Think of it like cooking: the best ingredients and tools lead to the best results. A well-prepped workspace is the first step toward a beautiful, long-lasting pool finish. If you find yourself hunting for the right materials, remember that our team at Neptune Pools can supply all the necessary professional-grade supplies and chemicals you need for the job.
Your Essential Tool Kit
You don’t need a workshop full of fancy equipment, but a few key items are non-negotiable for replacing pool tiles. You’ll want a hammer and a chisel for carefully removing the old, damaged tiles. A trowel will help you apply the new adhesive evenly. You'll also need a mixing bucket for your adhesive and grout, some tile spacers to ensure even lines, and a sponge for cleanup. Assembling this essential tool kit before you begin means you won't have to stop mid-project to run to the store, which makes the whole process feel much more manageable.
How to Choose the Right Tiles
Not all tiles are created equal, especially when they’ll be submerged in water and exposed to the elements. Your pool tiles need to be tough. Look for materials that can handle constant exposure to pool chemicals and sunlight without fading or breaking down. A complete guide to pool tile replacement will always recommend porcelain and ceramic tiles. They are incredibly strong, resist water absorption, and aren't slippery, making them a safe and durable choice for any pool. Taking the time to select quality tiles now will save you from having to repeat this process in a few years.
Which Adhesive Is Best for Pool Tiles?
The adhesive is the literal glue holding your project together, so choosing the right one is critical. The best adhesive for your pool tiles depends on your specific needs, from the type of tile to the climate you live in.
Thin-Set Mortar
Thin-set mortar is a classic, reliable choice for pool tile installation. It’s a cement-based product that creates a very strong bond and works well with most common tile types, like porcelain and ceramic. Many professionals consider it a go-to pool tile adhesive for its strength and dependability in underwater applications.
Modified Thin-Set Mortar
Here in Denver, we see significant temperature swings from day to night and season to season. That’s where modified thin-set mortar comes in. This type of adhesive is enhanced with polymers, which add flexibility. This allows the adhesive to handle expansion and contraction caused by temperature changes without cracking, making it one of the best tile adhesives for swimming pools in climates like ours.
Epoxy Adhesive
If you’re looking for maximum durability, epoxy is an excellent choice. Epoxy adhesives are incredibly strong and create a waterproof seal that is highly resistant to pool chemicals and temperature changes. While it can be a bit more challenging to work with than mortar, its resilience makes it a top-tier option for ensuring your tiles stay put for years to come.
Silicone Sealant
For a very small, quick fix, like sealing a tiny gap around a single tile, a waterproof silicone sealant can work in a pinch. However, it’s important to know its limitations. Silicone doesn't offer the same structural strength as mortar or epoxy, so it should only be considered a temporary patch, not a long-term solution for setting tiles.
Selecting the Right Grout
Grout does more than just fill the space between your tiles. The right pool tile grout is essential for protecting the underlying surface from water infiltration, which can cause much bigger problems down the road. It also locks the tiles in place, adding to their stability and preventing them from shifting or coming loose. A high-quality, epoxy-based grout is often recommended for pools because it resists stains, chemicals, and mildew, keeping your waterline looking clean and new for much longer.
How to Replace Pool Tiles: A Step-by-Step Guide
Ready to give your pool a fresh look by replacing those cracked or loose tiles? It’s a project you can definitely handle with the right tools and a bit of patience. Following these steps carefully will help you get a professional-looking result that lasts. Let’s walk through the process together, one step at a time.
Step 1: Drain the Pool
First things first, you need a dry workspace. You’ll have to lower your pool’s water level so it’s at least a few inches below the lowest tile you plan to replace. For a small repair, you might be able to use the pool pump’s “waste” setting. For a larger project, a submersible pump is your best friend for draining the water quickly and efficiently. Once the water is at the right level, make sure the tiles and the surrounding area are completely dry before you move on to the next step. This ensures the old materials come off cleanly and the new adhesive will stick properly.
Step 2: Remove the Old Tiles
Now it’s time to say goodbye to the old tiles. Using a hammer and a small chisel or a grout scraper, carefully chip away at the grout surrounding the damaged tile. The goal is to isolate it so you don’t accidentally harm its neighbors. Once the grout is gone, you can gently pry the old tile off. If it’s stubborn, you may need to break it with the hammer and chisel it out in pieces. After the tile is gone, scrape away all the old mortar or adhesive from the pool wall. You want to get down to the clean, solid surface underneath, which is called the bond beam.
Step 3: Clean and Prep the Surface
A successful tile job is all about preparation. The spot where your new tile will go needs to be perfectly clean, dry, and smooth. Use a wire brush to scrub away any remaining dust, old adhesive, or debris. Wipe the area down with a clean cloth to make sure it’s spotless. Take a moment to inspect the exposed surface for any cracks or damage. If you see significant cracks or crumbling, it could point to a deeper issue. For major concerns, it’s always best to get a professional opinion on potential structural repairs before proceeding with a cosmetic fix.
Step 4: Apply Adhesive and Set the New Tiles
With your surface prepped, you’re ready for the new tile. Mix your waterproof pool adhesive, like a thin-set mortar or epoxy, following the manufacturer’s instructions precisely. It’s best to mix small batches at a time so it doesn’t dry out before you can use it. Apply a thin, even layer of the adhesive to the back of the new tile, a technique often called "buttering." Then, press the tile firmly into place on the pool wall, giving it a slight wiggle to ensure a strong bond. Use tile spacers to maintain even gaps between tiles for a clean, uniform look.
Step 5: Grout, Seal, and Let It Cure
Patience is key here. Let the adhesive cure completely, which usually takes at least 24 hours (but always check the product label). Once it’s set, you can mix your waterproof pool grout. Apply the grout over the tiles with a rubber grout float, pressing it into the joints at a 45-degree angle. After about 15 to 30 minutes, use a damp sponge to gently wipe the excess grout off the tile surfaces. The most important part is letting everything cure. This can take several days. Rushing this step can ruin all your hard work, so give it the time it needs.
Step 6: Refill and Balance Your Water
Once the grout has fully cured according to the manufacturer's directions, you’ve reached the final step: refilling the pool. Fill the water back to its normal level. As soon as it’s full, you need to test the water chemistry. It’s crucial to balance the pH, alkalinity, and calcium hardness right away to protect your new grout and tiles from staining or damage. Properly balanced water is the secret to making your repair last. If you need help getting your water chemistry just right, our weekly cleaning and maintenance service can take the guesswork out of it for you.
Common Mistakes to Avoid When Replacing Tiles
Replacing your pool tiles can be a really rewarding project, but a few common slip-ups can turn your hard work into a headache down the road. Even if you follow all the right steps, one of these missteps can compromise the look and longevity of your new tile. Knowing what to watch out for is half the battle. From rushing the prep work to using the wrong materials, these mistakes are surprisingly frequent in DIY projects, and they can lead to tiles that crack, pop off, or discolor within a season.
Taking the time to get these details right will ensure your beautiful new tiles stay put for years to come. Think of it as insurance for your investment of time and money. We'll walk through the most common pitfalls so you can sidestep them completely. Whether you’re patching a small area or taking on a bigger project, avoiding these errors will save you time, money, and frustration. It’s about working smarter, not harder, to get a result that looks professional and holds up against the elements, especially our unique Colorado weather. Let's make sure your hard work pays off with a beautiful, durable finish.
Don't Skip Surface Preparation
Think of this as the foundation of your entire project. If the surface isn't perfectly prepared, your new tiles won't stand a chance. Many people get excited to start setting tiles and rush through this step, but any leftover debris, oil, or old adhesive will prevent the new mortar from bonding correctly. This is one of the main reasons tiles fail and pop off prematurely. A properly prepared surface should be clean, smooth, and structurally sound. This means grinding away any old material and patching any cracks before you even think about mixing your adhesive. Taking the time to prepare the surface is the single most important thing you can do for a lasting finish.
Use the Correct Grout and Adhesive
The adhesive and grout aisle at the hardware store can be overwhelming, but for pools, the choice is critical. You can't just grab any standard thin-set or grout. Pool tiles are constantly submerged in chemically treated water, so they require specialized, waterproof products that can withstand that environment. Using the wrong materials is a recipe for disaster. It can lead to premature cracking, discoloration, and crumbling grout, which allows water to get behind your tiles and cause them to loosen. Always choose an adhesive and pool tile grout specifically formulated for underwater use. If you're unsure, our team at Neptune Pools can always help you source the right supplies and chemicals for the job.
Account for Expansion and Movement Joints
Your pool shell isn't static; it subtly expands, contracts, and shifts with temperature changes and ground movement. This is especially true here in Denver, with our wide temperature swings. Expansion joints are flexible gaps, usually filled with sealant, that are intentionally left in the tilework to absorb this movement. Neglecting to include them can put immense stress on the tiles and grout, leading to widespread cracking and tile failure. If you're retiling a large area, it's crucial to honor the existing expansion joints in your pool's structure. This is a more technical step where professional experience really pays off, ensuring your tile can handle natural shifts without breaking.
Give It Enough Time to Cure
I get it. After all that hard work, you're eager to fill the pool and jump in. But patience is a virtue, especially when it comes to tile work. The adhesive and grout need time to cure, which is the chemical process where they harden and gain their full strength and water resistance. Rushing this and refilling the pool too soon can wash out the grout and weaken the adhesive bond, causing your brand-new tiles to fail. Always read the manufacturer's instructions for your specific products and follow the recommended curing times to the letter. It might feel like an eternity, but waiting that extra day or two is essential for a durable, professional-quality result.
Check for Local Permits and Regulations
This might not be the most exciting step, but it's an important one. While you likely won't need a permit to replace a few cracked tiles, larger projects often do. If your tile replacement is part of a more extensive remodel or rehab, you may need to get a permit from your local city or county office. Forgetting to check can lead to fines or problems if you decide to sell your home later. A quick call to your local building department in the Denver area can clarify the requirements. It’s a simple step that ensures your project is compliant with all local codes and protects your investment in the long run.
DIY vs. Hiring a Pro: What's Right for You?
Deciding whether to replace your pool tiles yourself or call in a professional is a big question. The right answer depends on the size of the job, your budget, your timeline, and how comfortable you are with home improvement projects. A few cracked tiles might be a manageable weekend task, but a full waterline replacement is a different story. Let's break down the factors to consider so you can make a choice that you feel good about and that gives you the best results for your pool.
When to Tackle It Yourself
If you’re generally handy and have some experience with similar projects, a DIY tile repair can be a rewarding and cost-effective option. This approach is best suited for minor fixes, like replacing a handful of chipped or loose tiles. You get the satisfaction of doing it yourself and can save some money on labor costs. However, it’s important to be realistic. Make sure you have the right tools, a solid understanding of the process, and enough time to do the job without rushing. A poorly done repair can lead to bigger problems down the road, so honesty about your skill level is key.
When to Call a Professional
For larger projects, intricate tile patterns, or if you simply want the job done right without the headache, hiring a professional is your best bet. A pro brings years of experience and specialized tools, ensuring the result is not only beautiful but also durable. They know how to properly prep the surface and handle any unexpected issues that might pop up. If you're looking at a full waterline replacement or have significant damage, calling an expert is a wise investment. Our team specializes in pool remodels and rehabs, guaranteeing a high-quality finish that will last for years.
What Does Professional Pool Tile Replacement Cost?
Understanding the potential cost can help you budget and decide if hiring a pro is the right move. While every project is different, you can use some general figures as a starting point. For smaller repairs, you might expect to pay around $25 per square foot. If you’re replacing all the waterline tiles, the cost is often calculated per linear foot, typically around $25, plus the cost of the tiles themselves. Keep in mind that if the underlying concrete surface needs to be removed and repaired, it could add $1,000 or more to the total. The best way to get an accurate number is to request a detailed quote for your specific project.
How to Maintain Your New Pool Tiles
After all the work of replacing your pool tiles, the last thing you want is to see them looking dull or damaged within a few years. The good news is that with a little consistent care, you can keep your new tiles looking pristine for a long time. Proper maintenance isn't just about aesthetics; it’s about protecting the structure of your pool and preventing small issues from turning into costly repairs.
Think of it like caring for any other major feature of your home. A simple, routine approach will protect your investment and ensure your pool remains a beautiful centerpiece for your backyard. By staying on top of cleaning, water chemistry, and grout health, you can enjoy that fresh, new-tile look for years to come. We’ll walk you through the essential steps to make it happen.
Clean and Inspect Your Tiles Regularly
One of the simplest yet most effective ways to protect your tiles is through regular cleaning. A weekly scrub along the waterline with a soft brush and a mild tile cleaner will prevent the buildup of grime, oils, and algae. This routine also gives you the perfect opportunity to inspect your tiles up close. Look for any small cracks, chips, or signs of grout erosion.
Catching these issues early is key. A tiny crack might not seem like a big deal, but it can allow water to get behind the tile, leading to bigger problems down the road. If you'd rather leave the scrubbing to someone else, our weekly cleaning and maintenance services can keep your tiles sparkling while providing a professional eye to spot any potential concerns.
Keep Your Water Chemistry Balanced
Your pool’s water chemistry has a huge impact on the health of your tiles. If your water is out of balance, it can lead to two major problems: scaling and etching. Scaling happens when high calcium levels cause a rough, white film to build up on your tiles, which is tough to remove. Etching, caused by low pH or alkalinity, can slowly eat away at the tile and grout surface.
To prevent this, test your water regularly and keep the pH, alkalinity, and calcium hardness within the recommended ranges. Using a pool cover when it's not in use can also help by reducing debris that can affect water balance. If you're struggling to get your levels right, we can help you find the right supplies and chemicals to keep your water perfectly balanced.
Reseal Grout Joints as Needed
The grout between your tiles is just as important as the tiles themselves. It’s the glue holding everything together and providing a waterproof barrier. Over time, pool chemicals and weather can cause grout to break down, become porous, or crack. When this happens, water can seep behind the tiles, compromising the adhesive and potentially damaging the pool's shell.
Inspect your grout lines every year or so. If you notice areas that are crumbling, missing, or stained, it’s time to reseal. Repairing or resealing grout joints is a critical step to restore your pool's style and protect its structure. This proactive measure maintains the lasting beauty of your tile work and prevents more extensive damage.
Tips for Denver Pool Owners
Here in Denver, our pools face a unique challenge: freeze-thaw cycles. This weather pattern makes tile maintenance especially important. When water gets into tiny, unseen cracks in your grout or tiles and then freezes, it expands. This expansion can pop tiles right off the wall or create larger cracks, leading to significant damage over a single winter.
Prompt swimming pool tile repair helps stop this progression early. Waiting too long often leads to a full tile replacement, which is far more expensive than addressing a small issue right away. Make it a habit to inspect your tiles closely in the fall before you close your pool and again in the spring when you open it. This vigilance is your best defense against Colorado's demanding climate.
Ready for a cleaner pool?
Denver's trusted pool care professionals since 1982. Get started today.
Schedule ServiceFrequently Asked Questions
A few of my tiles are cracked. Do I need to replace all of them? Not necessarily. If you only have one or two isolated cracks, you can likely get away with a simple spot repair. However, if you're seeing cracks on multiple tiles throughout the waterline, or if you also notice loose tiles and crumbling grout, it often points to a more widespread issue. This suggests the tiles are becoming brittle and failing as a system, which usually means a full replacement is the smarter long-term solution.
Can I just stick a fallen tile back on with some kind of glue? I would strongly advise against that. A tile that falls off is usually a symptom of a problem with the surface behind it, like deteriorating adhesive or water seepage. Simply gluing it back on is a temporary fix that doesn't address the root cause. You need to thoroughly clean the spot, remove all the old material, check the underlying surface for damage, and then set a new tile with a proper waterproof pool adhesive for a repair that will actually last.
What's the most critical step in the replacement process that I shouldn't mess up? Without a doubt, it's the surface preparation. It’s tempting to rush this part, but if the surface isn't perfectly clean, dry, and smooth, your new adhesive won't bond correctly and your tiles will eventually pop off. Taking the extra time to scrape away all the old material and ensure you have a solid foundation is the single most important thing you can do to guarantee a durable, professional-looking result.
Why is it so important to use special pool tile adhesive and grout? Your pool is a demanding environment. Standard home improvement store adhesives and grouts are not designed to be constantly submerged in chemically treated water. They will break down quickly, allowing water to get behind your tiles. This can lead to widespread tile failure and even damage the pool's shell. Using products specifically formulated for pools ensures they can withstand the chemicals and constant moisture, creating a waterproof barrier that protects your investment.
After I replace my tiles, how can I make sure they last, especially in Colorado? Consistent maintenance is your best friend. The two most important things you can do are keeping your pool water chemistry balanced and cleaning the waterline weekly. Balanced water prevents ugly scaling and protects the grout from deteriorating. Regular cleaning stops grime from building up and gives you a chance to spot any tiny cracks or issues early. This is especially vital here in Denver, as catching problems before winter can prevent the freeze-thaw cycle from turning a small crack into a major repair.
Related Blogs